A Lesson to Learn From...
/I recently gave an old friend a lesson. Having not taught him for a few years I had an inkling as to what to expect, but things came together so well I thought the information might be beneficial to more than just one student.
This is why looking at still frames of an athletic motion can be deceiving. There are six different images/videos here that we will go through in a specific order. To get the most out of this post please make sure you go through this it slowly. Be sure you comprehend each image before moving to the next…
(The original/before is always on the right in all of the images/videos)
Image 1:
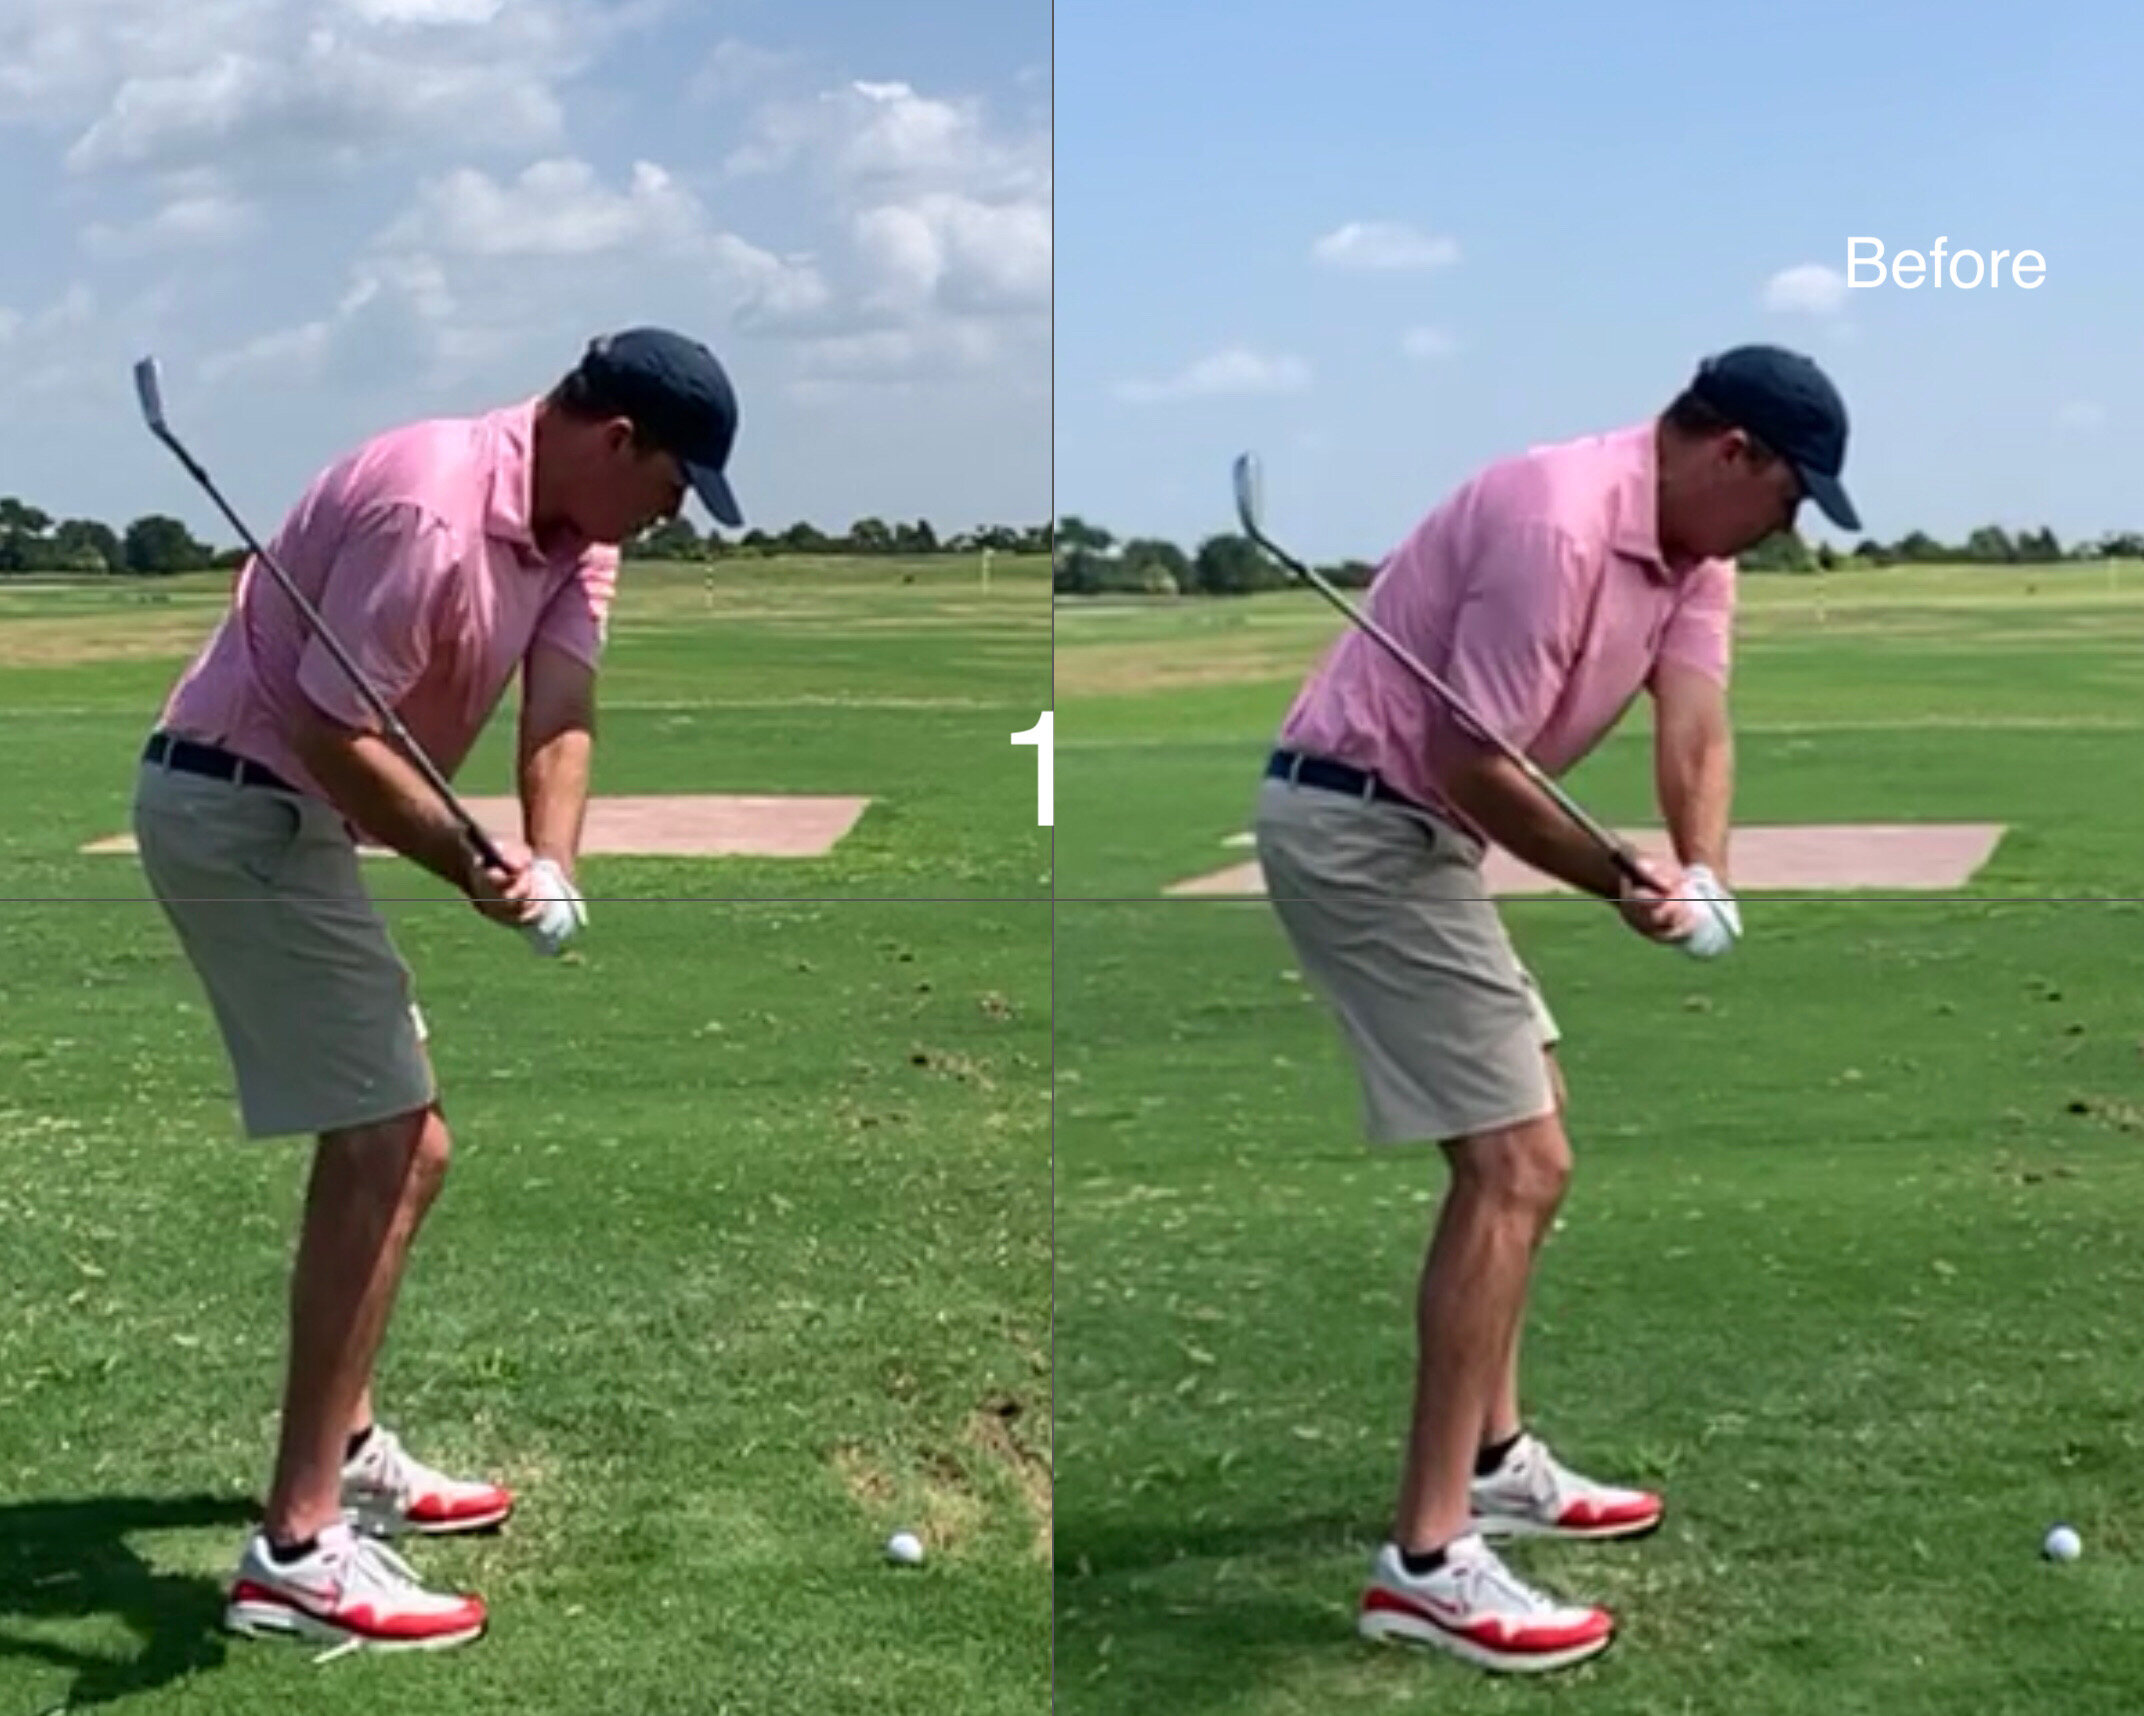
Notice how these two images appear to be somewhat similar. I think many of us would give them both a thumbs up! They might be somewhat similar, but the outcomes are very different due to the unseen forces being applied to the club. Do not be deceived!
Image 2:
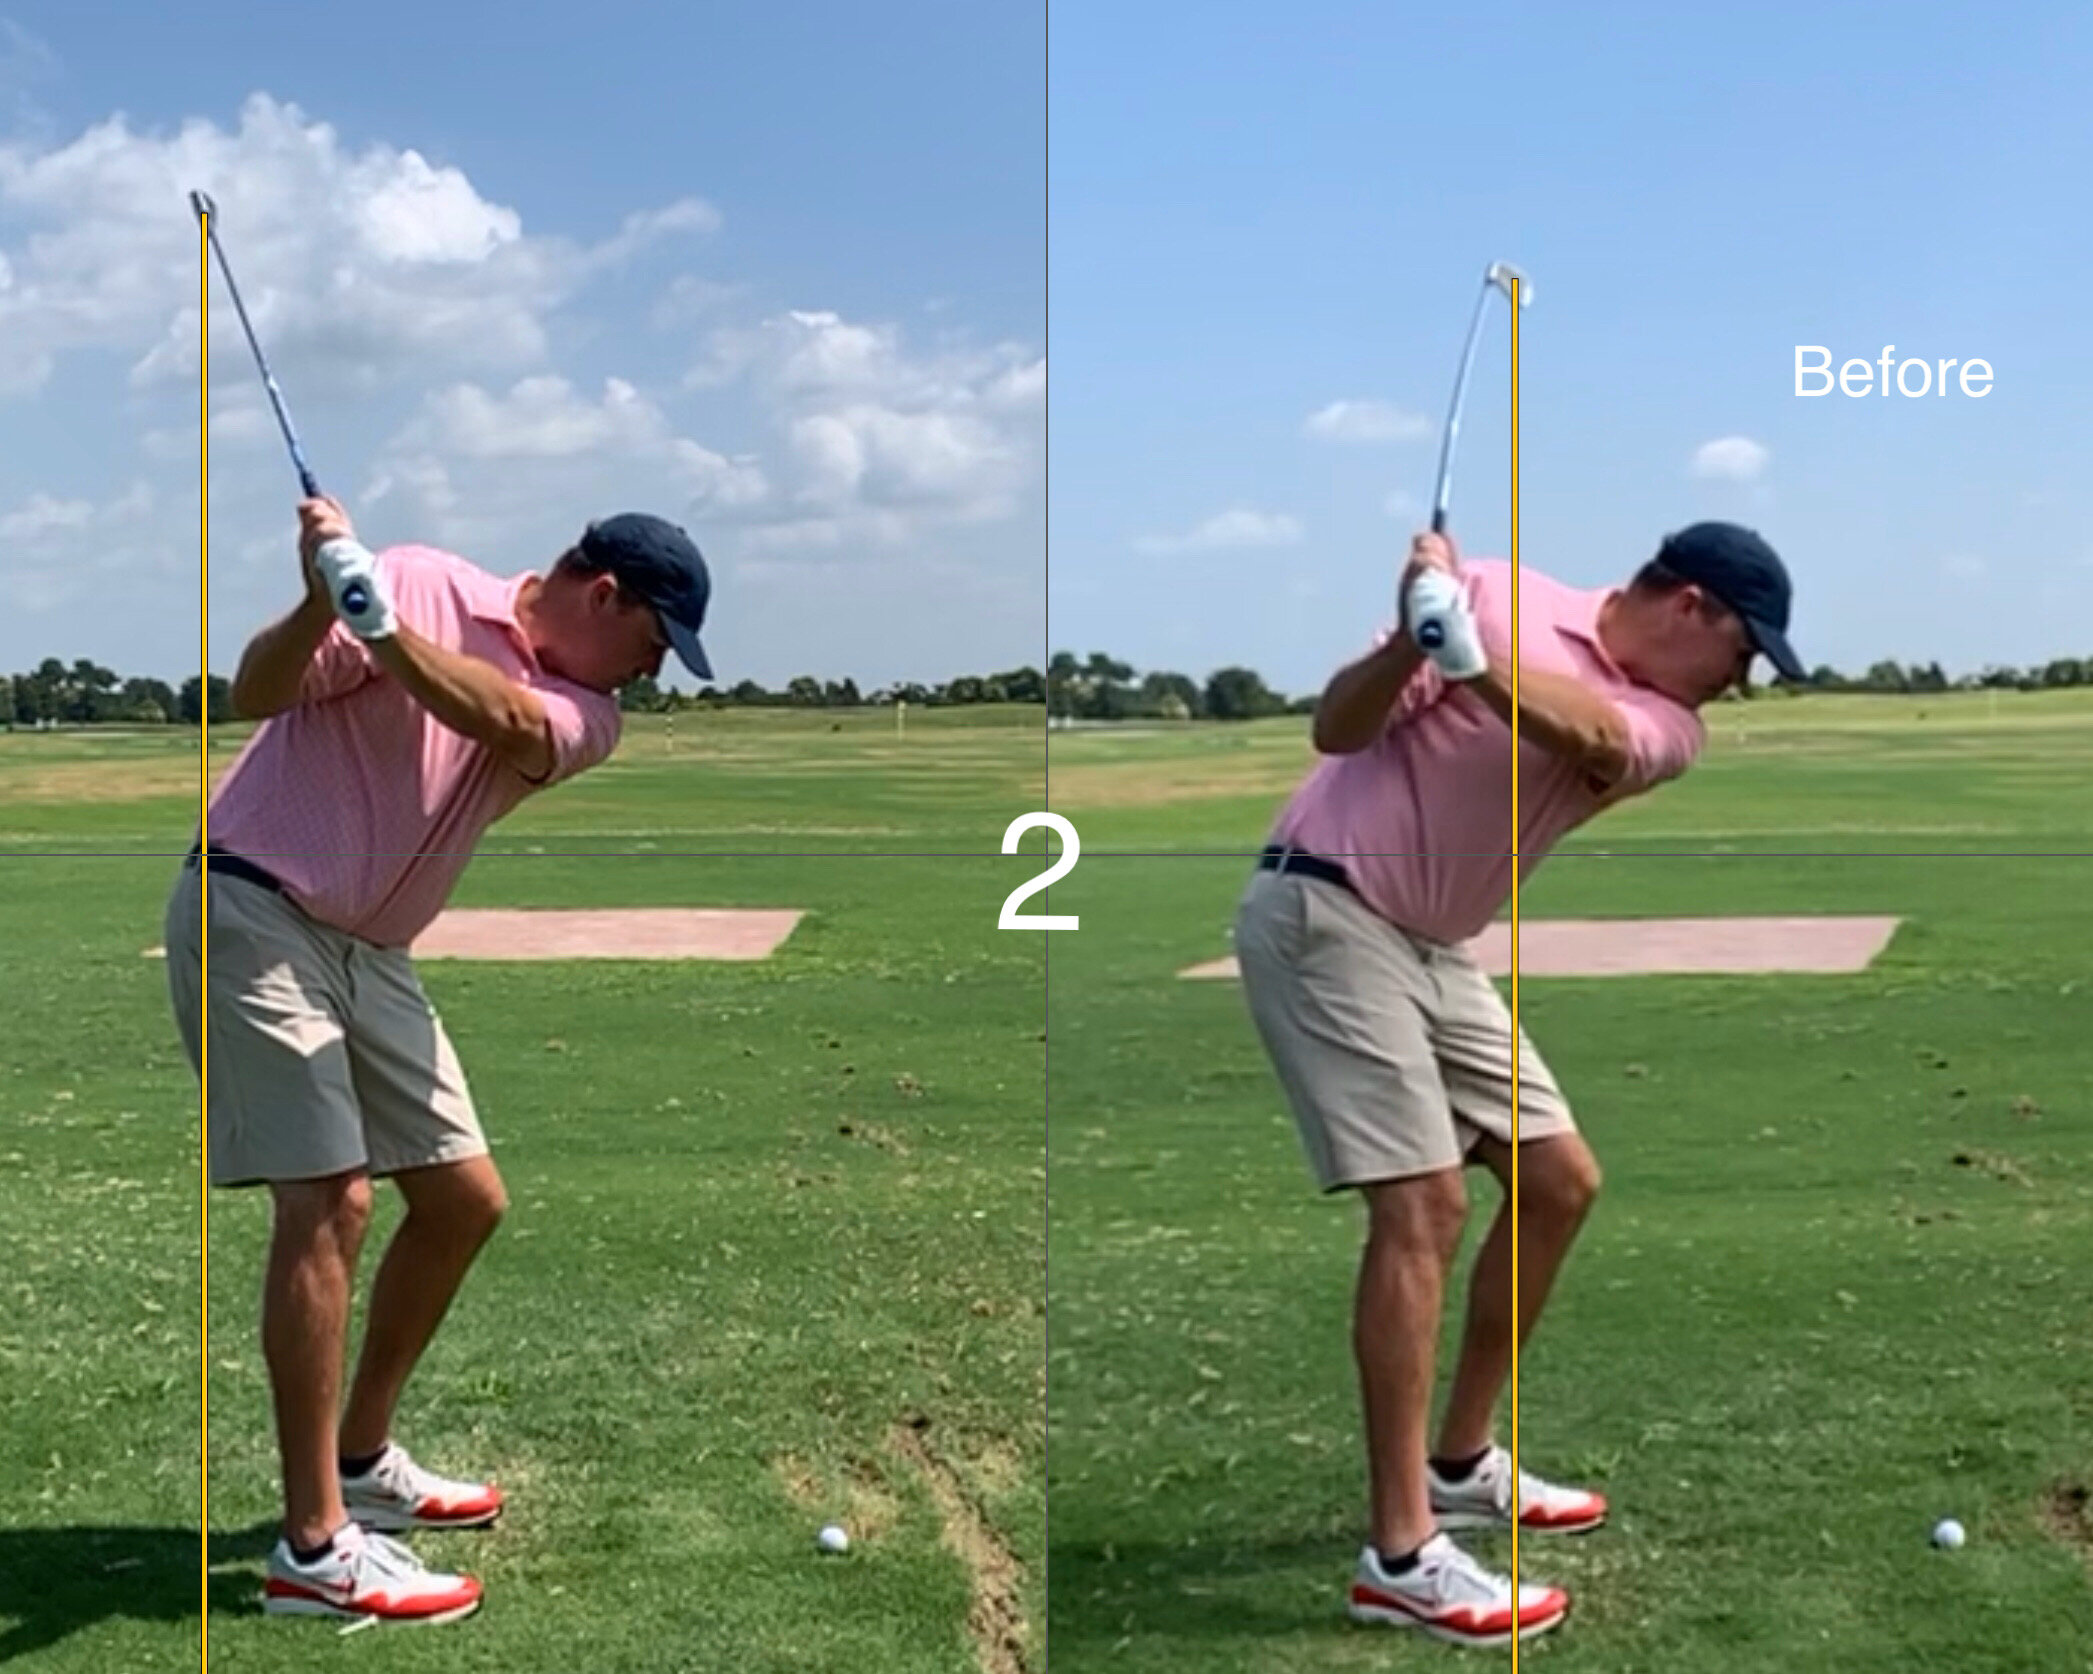
The player at the top of the backswing. The yellow line indicates where the sweet spot is relative to the feet and the golf ball. Notice that in the ‘after’ version the club head is significantly further to the inside than the original. This is shown by the distance between the line and the golf ball.
Image 3:
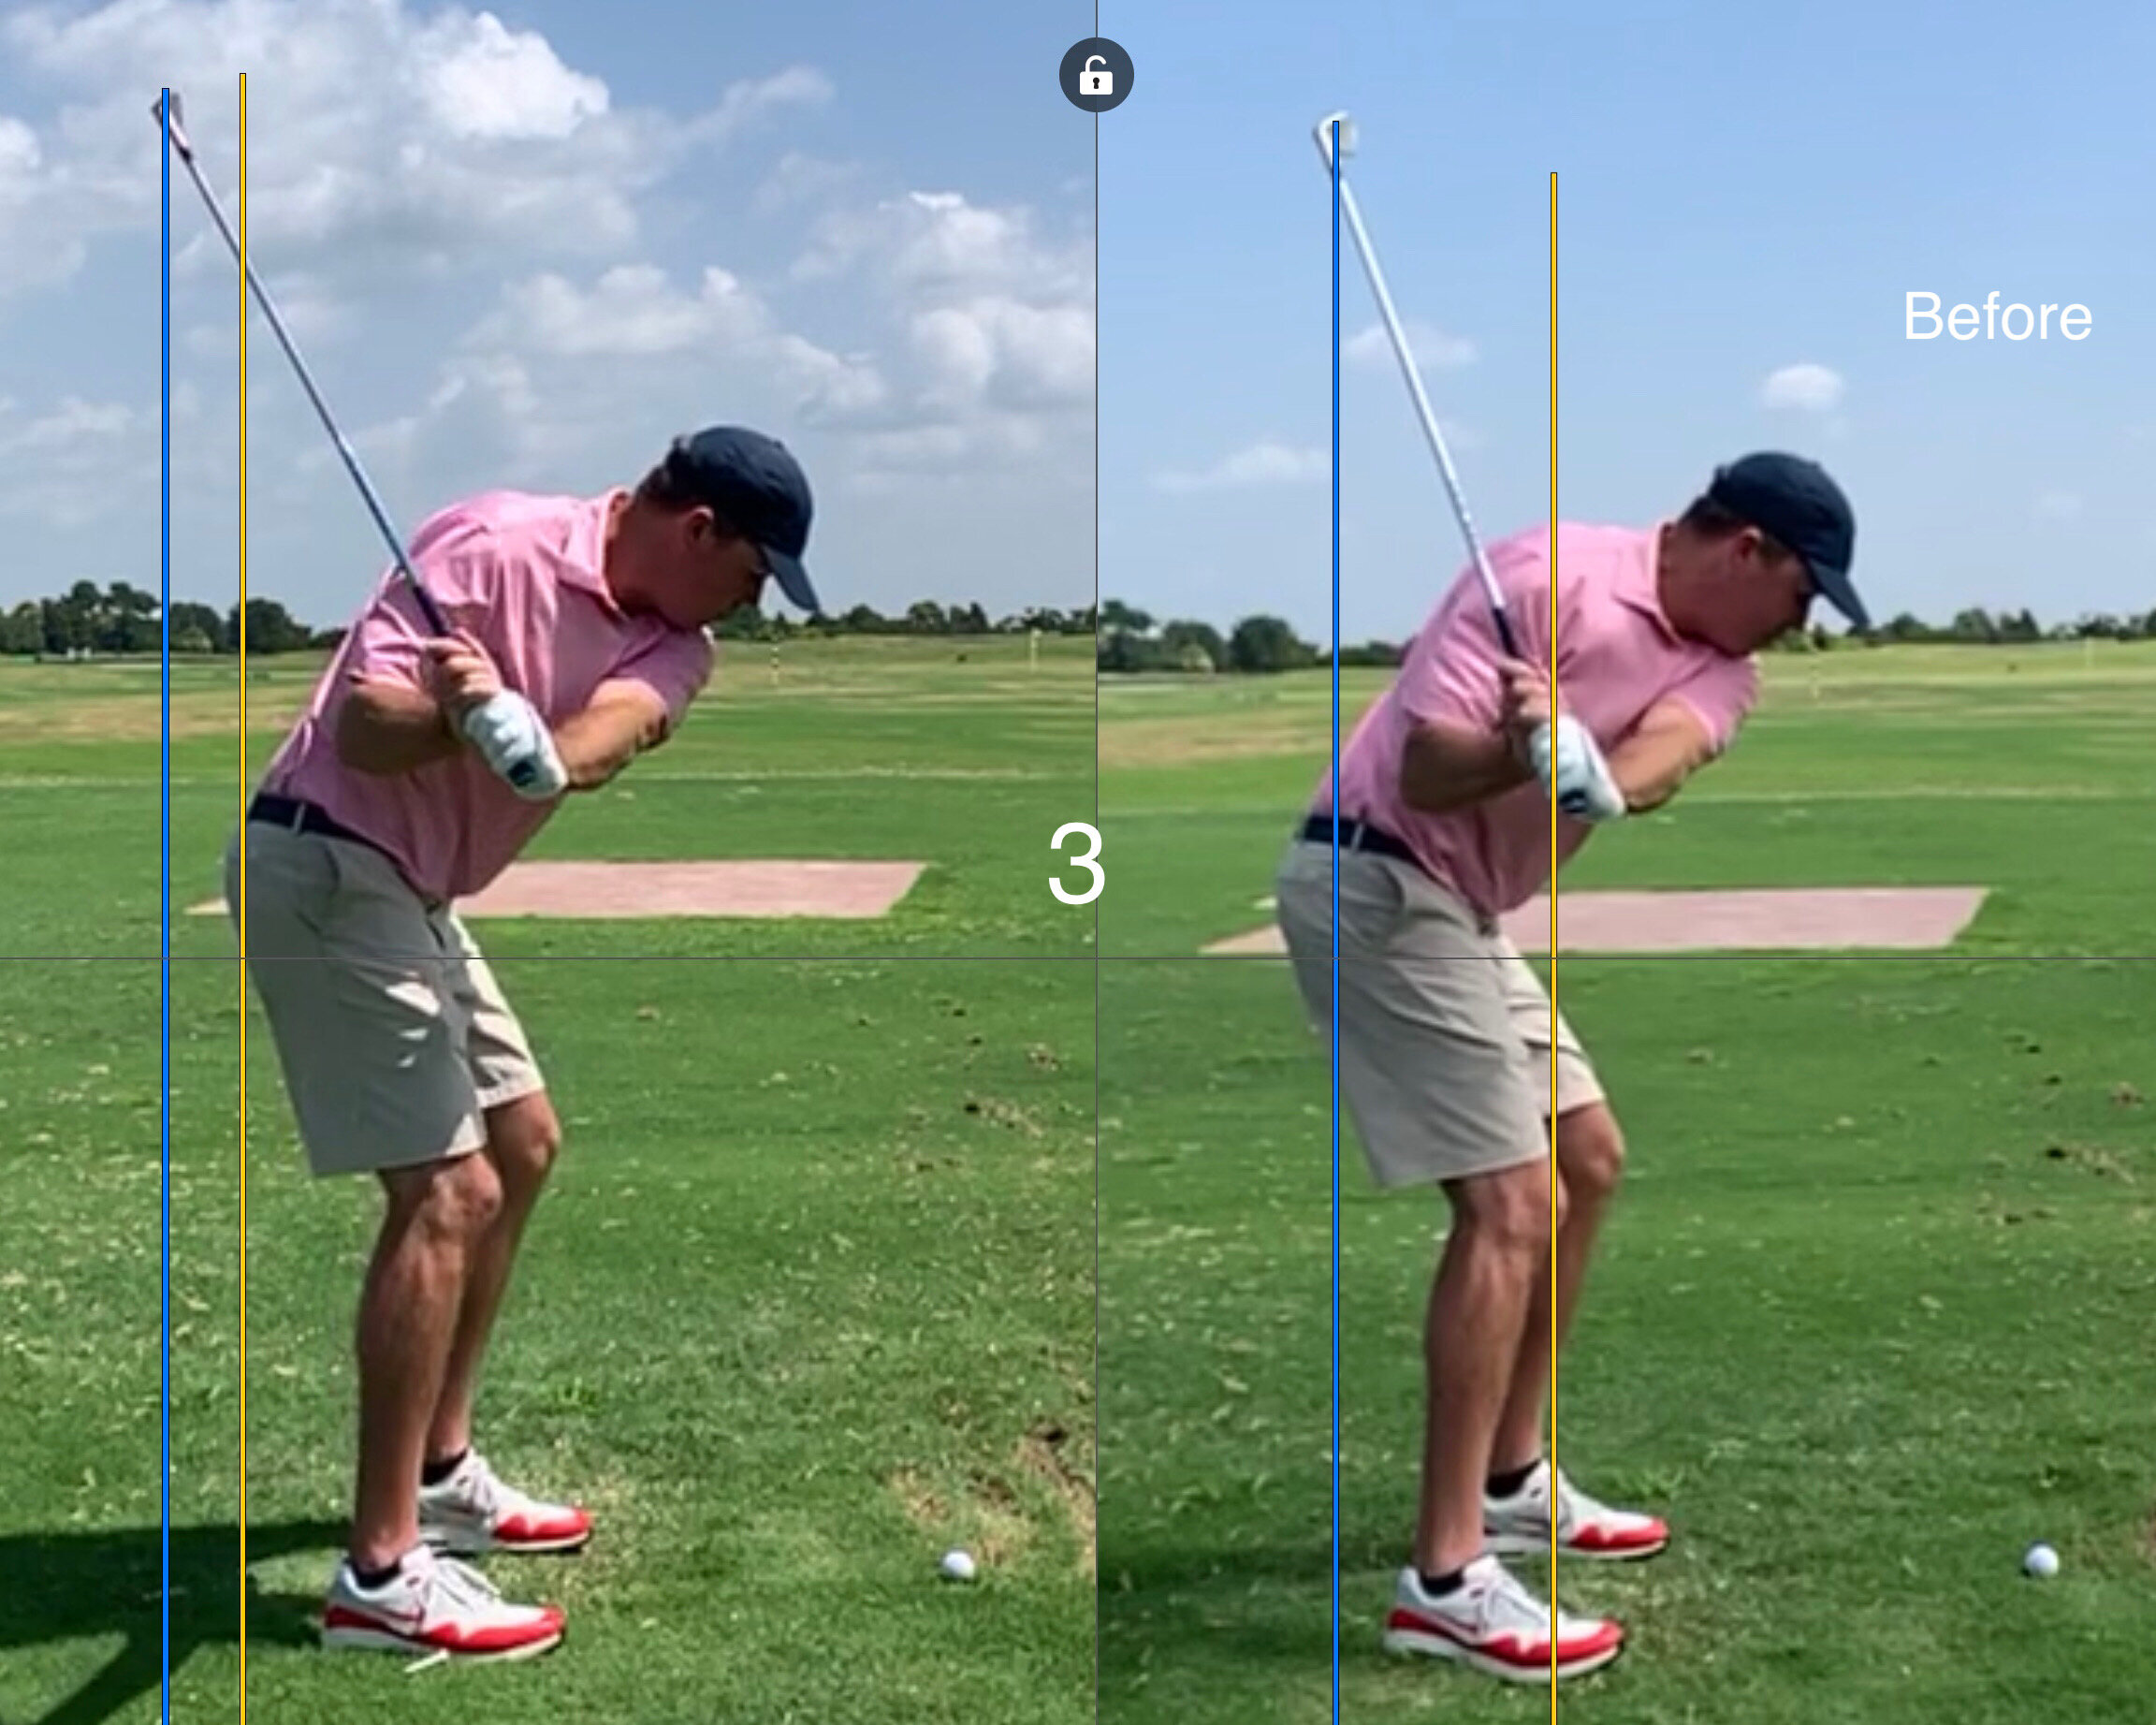
At approximately lead arm parallel to the ground notice how the golfer has had to force the club head to lay down on the before side. This is indicated by the difference in gap between the yellow and blue lines. Not much difference here, but the force the player is exerting on the club is very different here.
Image 4:
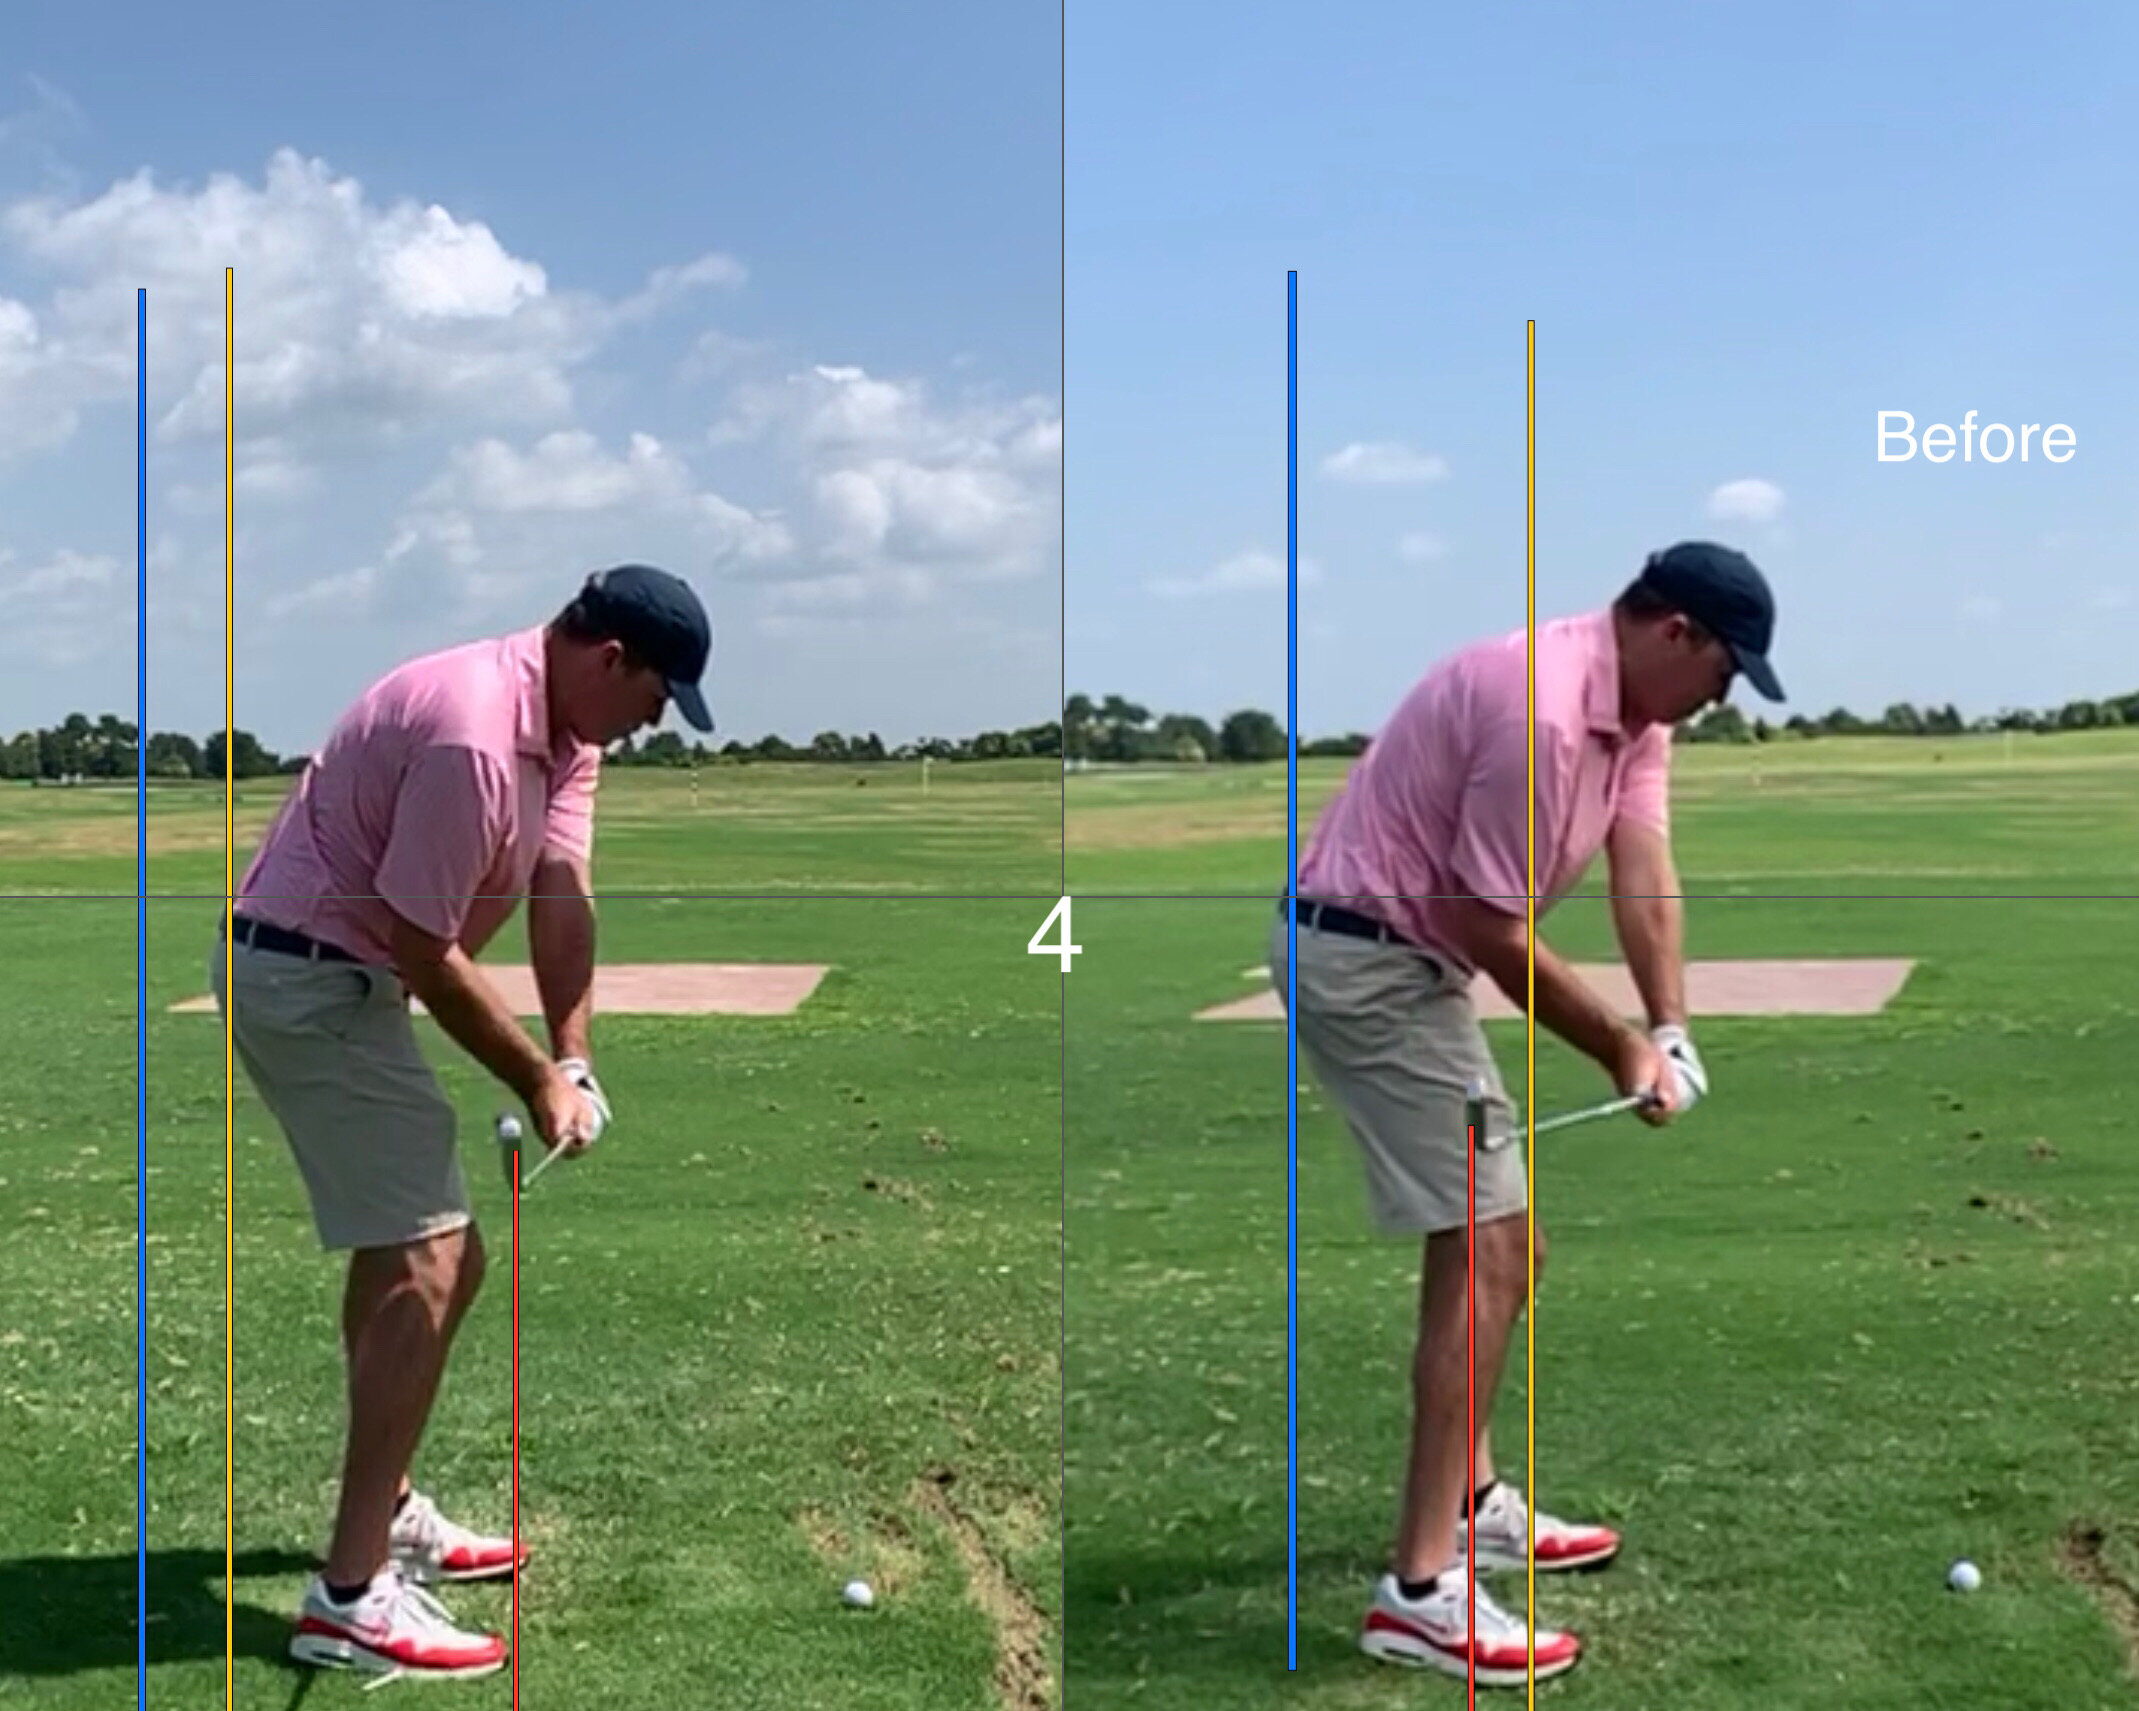
This is where the difference starts to show. On the right side you’ll notice that the excessive, yet necessary, lay down force has bled over and now has the club head in a position where the path will be too far out to the right, strike quality will be compromised and the player is dealing with blocks and hooks. Notice how the gap between blue and red line on the left is greater on the left side. That’s due to the fact that the golfer is free to rotate instead of having to force the club head to the inside in the downswing. Who wouldn’t want to turn hard and fire in the downswing?
Image 5:
The original downswing! With this move the golfer gets the club head too far to the inside coming into the golf ball and will struggle with blocks, hooks and poor quality strikes. Success with this downswing is very much timing reliant.
Image 6:
The objective for the downswing! With this move the golfer will deliver the club with a more neutral path, will hit down on the ball appropriately and be far less reliant on timing coming into impact. A happy golfer and coach.
So how did we get it done? With a short-ish backswing the club head needed to be in a better position at the top of the backswing as the player had very little time to calibrate and position the club head for a proper delivery. Our goal was to improve the position at the top of the backswing in order to make the downswing free-er so the golfer could rotate hard left through impact. A good recipe for crisp strikes coupled with improved accuracy.
The results here were as intended - a more neutral path and better attack angle for straighter and properly struck shots.
Please don’t ever judge a golf swing by one picture.


